guest tutorial from sugarbee craft edition- rolled fabric necklaces
As an Amazon Associate I earn from qualifying purchases.
We’re thrilled to introduce you to today’s guest. Chances are, you already love Mandy from Sugar Bee Craft Edition. But if you need a few more reasons to love her, check out her fabulous rolled flowers, the loveliest mod podge green shoes, and a fantastic variation of pillowcase dresses (our favorite is the shirred one).
Today, she’s sharing a fabulous tutorial for destashing your supply of fabric scraps (you know you have one…).
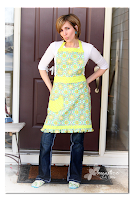
Hi Everyone – I’m Mandy from Sugar Bee Craft Edition – I’m the one KoJo rightfully beat in the finals of SoYouThinkYou’reCrafty – wasn’t that comforter of theirs amazing?! It’s on my to-do list. Anyways, here’s a recent picture of me, trying out a braid (I’m trying to step up my style, so I’m all about trying new things…)-
Scrap-busters – what a fun week!! I can’t wait to see all the other projects – because I have Several BUCKETS of scraps – seriously – see (yes, one is spelled wrong – ignore that – oh wait – now that I pointed it out you’re probably searching for it – doh!)
Why is it that I can purge most of the house but when it comes to craft supplies I hold on to the smallest little scraps of things, “just in case” – I must be prone to selective hoarding.
Well, my solution for you today – Rolled Fabric Necklaces – so quick and easy and versatile!
Need something quick to wear?? You can whip up a rolled flower necklace with some scraps of fabric – really, quick and simple – here’s how:
–Rip strips of fabric (or sheets, like me!) that are approximately 1 inch wide.
–Follow my previous tutorial on How to Make Rolled Fabric Flowers – I even have a quick video for those who learn best that way. Make an odd number of flowers, 3 or 5 (my own opinion – I guess you could make even numbers if you want…). Anyone can join in on the fun:
–Next take your flowers and hot glue them onto a piece of felt in a necklace shape, as shown:
–Then cut off all the excess felt (but don’t cut completely between the flowers – the felt holds them together). Flip the necklace over and hot glue ribbon on each end. Then I glued a strip of felt to give it a little more stability. Here’s the back view:
That’s it – tie around your necklace and enjoy!
If you want to get fancy you can glue on chains instead of ribbon, and use different size rosettes, like here:
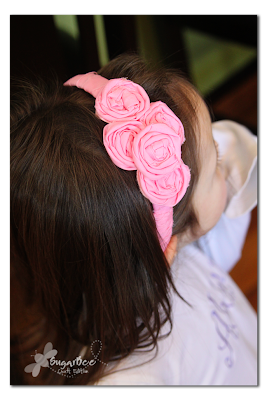
One of my girls wanted to tie it to her head like a headband. So I one-upped her and said – let’s just make it a REAL headband. So I cut her flowers apart from the necklace shape and glued them on the headband. I wanted 3, but she wanted to use all 5 – I made it work by layering them and love the dimension that gives.
Enjoy! Grab those scraps and start ripping them into strips so you can whip up some new accessories! Use the same method with tiny strips and you can make earrings to match!

Thanks Mandy… for more fantastic ideas, stop by Sugar Bee Craft Edition and say hi!


Fabulous!! I love them as a headband!!! 🙂
I think I need to make these to decorate Easter basket handles next month, how cute would that be! Hmm, I can even see a floral centerpiece in an Easter basket with the rolled floral accents on the handle. Yes, awesome! Thanks for the great post!
Cute necklace! I love the way it looks on a chain.
Love the rosette necklace. Love that you combined different sizes of rosettes.
Regards,
Tiffany @ Religious Necklaces